
In photography, the lighting is the key to success to get the desired results of the image. The lighting is very related to the diaphragm (APERTURE) and speed (SHUTTER speed).
If the pocket digital camera equipped with manual shooting mode, the diaphragm and the speed is set by the photographer. With the lighting mode that can be adjusted (manual shooting mode) lighting are usually more accurate compared with the auto shooting mode.
1. Over Exposure
Over Exposure is image with too much lighting (looks brighter than it should be). The excess carrier is lighting settings with APERTURE SHUTTER speed that is not appropriate. If seen in the matering, matering needle position in the area plus (+). As a result of excess exposure, the resulting image appears dominated by white / light.
There is mention of this with excess lighting harz term. Over Exposure can also be caused by a stroke of the flash is too strong / This can occur if the distance between objects with the flash (flash) is too close or too full of the photographer set the flash output.
2. Under Exposure
Exposure over from the opposite, is the lack of lighting (image looks too dark). The causes are the same, not the sesuainya APERTURE SHUTTER speed and (-). Under Exposure is usually also caused by a flash strike that is too weak. This can occur if the distance between objects with too much flash or the photographer is too minimal set flash output.
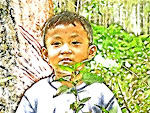
3. Light from the Home Object
Memotretlah with the object facing the light, not the photographer facing rays. Light coming from the front of the object will illuminate the body evenly. Face objects appear clear. If the object on the part of the face have a little shadow (shadow), this does not reduce the image, the image would add nuance.
4. Rear light from objects
When taking in outdoor objects (outdoor) should avoid taking pictures of the sun challenging. Taken with the challenging sun, the body of the object will appear dark. Moreover, if the sun is too strong then the entire object will appear black. Results such as this image can produce images siluet.
5. Morning Light
Photograph the object by using lighting in the morning is recommended. The morning light will produce a soft tonal colors. Results obtained by the image is relatively good, sounds good landscape (scenery) and human objects.
6. Afternoon Light
Photographs on the day the item is not recommended because of the nature of the lighting is too strong so that the resulting image tended to over Exposure, even though the settings APERTURE and SHUTTER speed is appropriate.
7. Light Day Afternoon
Utilization of the afternoon light is recommended in the shooting. Nature of lighting in the afternoon with the same morning. Moreover, when the sunlight intensity slightly decreased, at 16:00 down.
8. Day Night Lights
Utilization of light at night is actually using the light generated by the lamp as the light outside. Do not rely too flash because the results will not be natural. To menyiasatinya, SHUTTER photographer can use a low speed without additional lights flash. Unfortunately, the low speed SHUTTER akan make the image does not become a maximum, therefore, to address them photographer can be assisted with the use of a tripod.
Recommended for taking in the morning hours 06.00 - 09.00 and the afternoon at 16:00 to 18:00. Section, in the time-period there is good lighting.
12 May 2009
Subscribe to:
Post Comments (Atom)


No comments:
Post a Comment